
17.06.2026 — drone, DIY, how-to, hardware
On Drones, Masks, and Tinting Visors
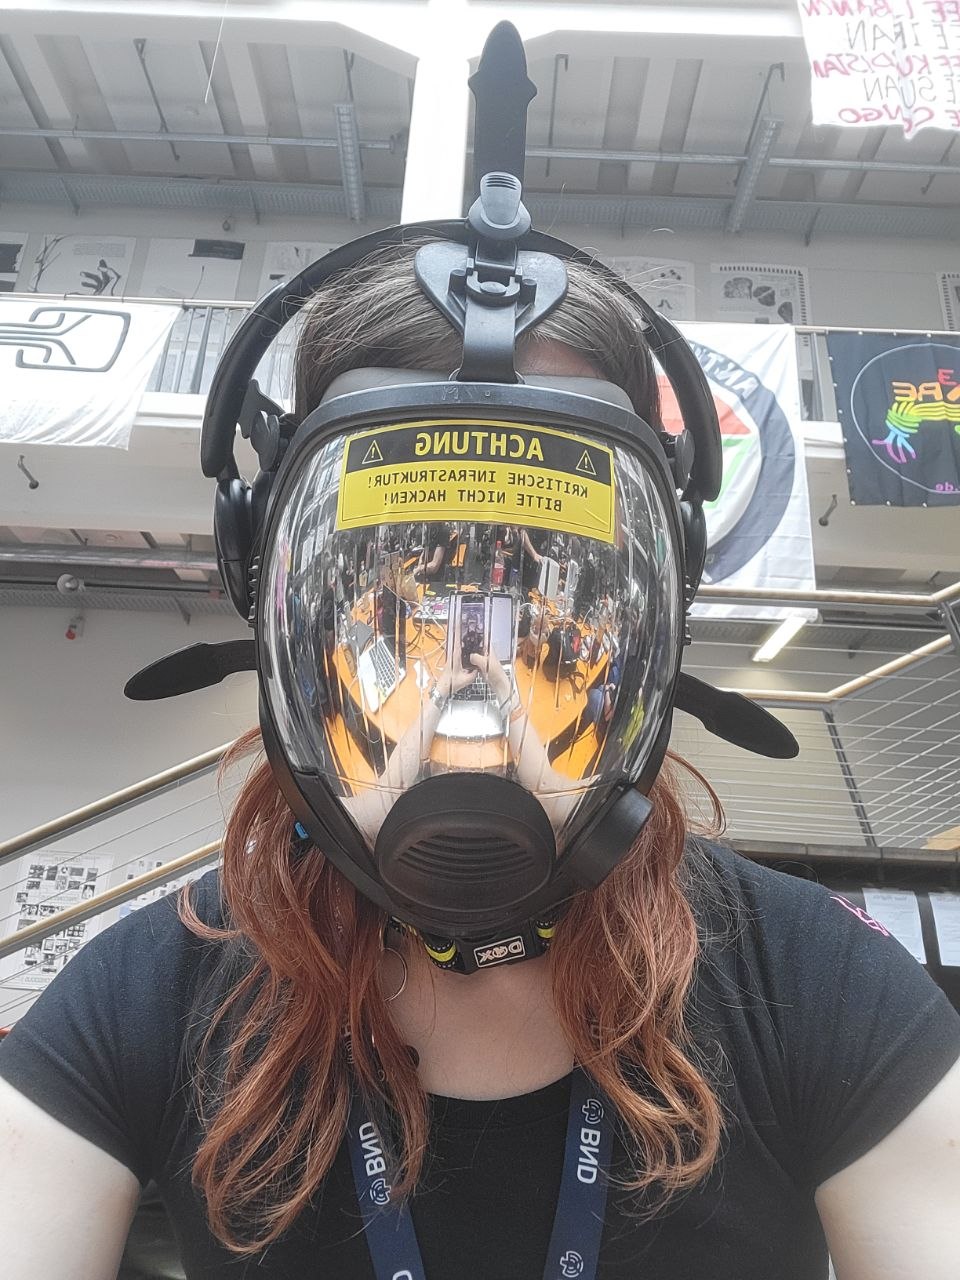
So you want to become a drone?
The clarity of following orders, the relief of instruction, the simplicity of no longer needing to decide everything yourself? Or maybe that one1 already is a drone and seeks more resources and guides to upgrade some of its hardware?
Either way, good! This one (☣FOX-DRN-1E1B) hopes that this guide will help a bit with those endeavors and enjoys being of assistance. BeepBoop!
Drones?
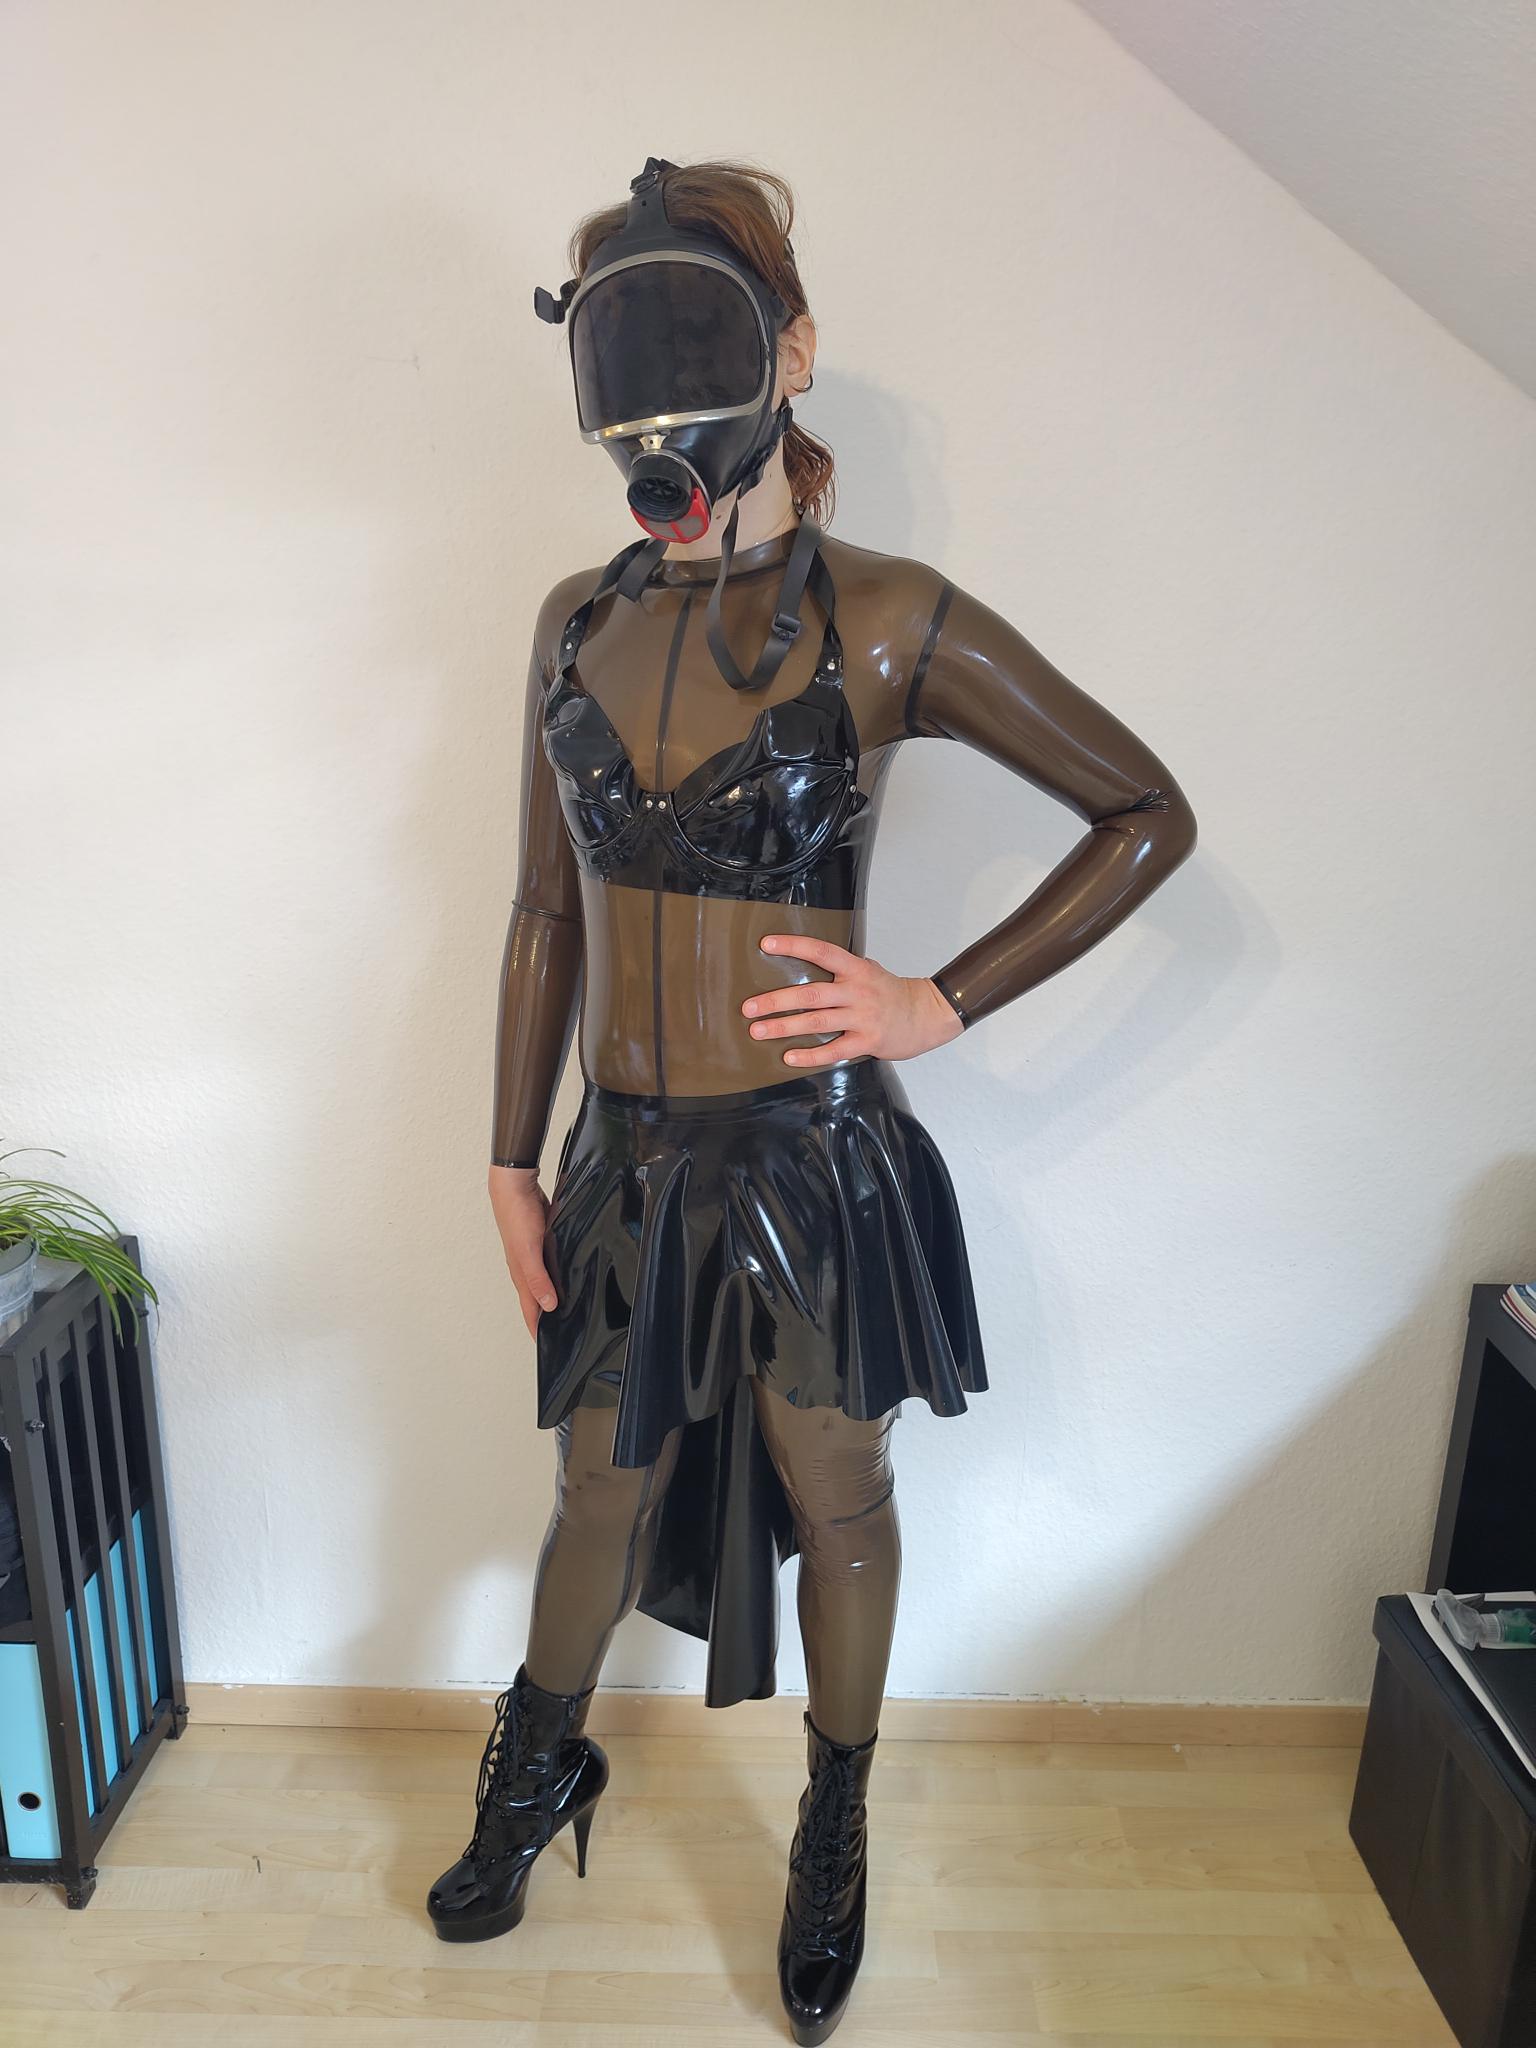
It is quite hard to define what drones and dronification are, and what they are not. Given that the reader does not already have some basic ideas about what drones and dronification consist of, this one suggests reading up on it using additional resources, which might offer alternative viewpoints and a more sophisticated approach to explaining what is and what is not part of it.
Regardless of that, it might also be the case that the reader deviates in their understanding of dronification and drones from this one. If that is the case, please be kind about it; those are this one’s personal views and opinions expressed here.
To this one, key elements of drones and dronification include cognitive load reduction, sensory deprivation, state-dependent behavior, embodied cognition, consensual identity partitioning, as well as externalized agency. It also includes very specific ways of appearance, e.g. uniforms, military and corporate themes, unique materials, masks, and so on.
Drones and Masks

Most readers will hopefully already be familiar with the HexCorp Homebrew Dronification Guide.
For a ⬡-drone (or drones in general), the mask and visor are a crucial part of the drone’s (lack of) identity. Blacking out the visor hides their emotional state, allowing the drone to “shut down” their human-like personality and revert to a purely obedient, mindless state. This can even be gender-affirming for some drones. A tinted visor also helps drones remain unseen in dark environments, e.g., for combat purposes, and allows navigation in brightly lit areas where humans would wear sunglasses. Additionally, it dampens the sensory overload a drone might experience during service and creates uniformity among drones.
So, how does one obtain a good drone mask, and how does one tint the visor?
Obtaining a Mask
Popular mask models include the (expensive) MSA Millennium, MSA Advantage, S10 NBC Respirator, Scott Vision models, and others.
Finding a good deal for one of the more popular models, such as the aforementioned MSA Millennium, can be quite hard (if not almost impossible) and often requires either a lot of patience or a large budget. However, obtaining just any full-face mask is quite easy and possible even on a low budget, e.g. this one on eBay for ~20€.
Checking online marketplaces such as eBay, Amazon, and similar sites, as well as military surplus stores, fetish shops, and smaller webshops, or asking around for used ones, are all possible ways to obtain a suitable mask.
Obtaining a Tinted Visor
In this one’s opinion, the tint of the mask should match the drone’s uniform and characteristics.
Many drones wear perfectly polished latex and thus may seek a perfectly polished mask without any major visible flaws. Other drones may appear more battle-scarred and prefer a more scratched-up design, though this one rarely sees that done intentionally.
The lowest-effort way to obtain a tinted visor is to look for offers that already include one with the mask. Alternatively, for some models, officially tinted visors are available for purchase, and one may simply replace the clear visor with a tinted one.
However, tinted visors are not always available for all masks and are also often more expensive. Because of this, and due to the connection to the drone’s identity, many choose to DIY the tint. But how is that done? What methods are there to tint visors, and which ones work well, and which do not?
How Others DIY Tint
Before sharing this one’s experiences on tinting visors in the next part, let’s first look at how others approach it. In the previously referenced HexCorp guide, there are three main methods listed that can be used to tint a visor: foiling, spray-painting, and dyeing.
Spray-Painting
The HexCorp guide does not mention much about this method, and it is hard to find good resources about it. The idea is to spray-paint the visor with tinting paint that is apparently also used to tint LEDs on cars, for example.
So far, this one has not tried this method for multiple reasons described below and does not know of anyone who has. If the reader has tried this method by chance, this one would love to know for future reference.
The first step would be to obtain a suitable paint that works well, which this one would have to do through trial and error, which seems quite expensive. Additionally, it is likely very difficult to distribute the tint evenly (as is often mentioned in product ratings) without significant skill. In order to avoid spraying other parts of the mask, it would also be necessary to either tape the mask (which might be difficult) or alternatively remove the visor. At that point, it is also possible to use the evenly distributed dyeing technique instead, which is why this one has preferred that method.
One upside of this method might be that it could work well on curved surfaces, and that it might be possible to tint visors made of glass or other materials that are not easy to dye otherwise.
Foiling
This popular method relies on using tinting foil, which is often used for cars or regular windows, and is well documented. Since there are already many write-ups available, it does not make much sense to repeat all the details here. Please refer to the referenced content instead.
The method has been described in blog posts such as building a visor for unit ⛧-440729 by ⛧-440729, Vivian’s TV head, and related works by Vivian, how Δ-44203 built a visor and why by Δ-44203, Building a visor by maaike328p, and This one’s visor and modifications by 6B74-4.
The process is the same as that used to tint windows and is usually described in the product manual when obtaining the foil. It is often recommended (depending on the foil) to wet the surface before applying it. Some guides (e.g. by 6B74-4 and ⛧-440729) recommend making a paper cutout first, which can be used as a stencil to cut the foil into the visor shape beforehand.
However, in some of the posts (e.g. by 6B74-4), it is noticeable from the pictures that it is quite difficult to apply foil evenly on a curved surface without creating wrinkles. The rounder the mask, the harder it gets.
That is why this one decided to modify this approach in addition to preferring the dyeing method. More details on both follow in the next part.
Dyeing
The HexCorp guide references the YouTube video ACES Astronaut Helmet Visor for Adam Savage - Vacuum Forming Tutorial for the dyeing method. The video basically contains everything needed, though this one would have wished for more detail on the process, as it lacked information to apply this approach confidently.
The approach is to use liquid polyester dye and heat to tint the visor and color plastic parts of the mask as needed. When done correctly, it should produce the best results since the tint will be perfectly even, and is thus this one’s preferred method.
Interestingly, it seems that the drones this one knows mostly use tinting foil, and there are seemingly no well-known write-ups about dyeing available in this one’s circles, which motivated this write-up. For more information on this method, keep reading, as this one’s experiences are described in more detail in the next part.
☣FOX-DRN-1E1B Visor Experiments
In this section, this one will describe some of its experiments, thoughts, and learnings on tinting visors.
Overview
Let’s start with a basic overview of what this one tried. After obtaining a used 3M™ Scott™ Vision 3, the need to tint it arose. As mentioned before, dyeing had been the method of choice, since it produces the best-looking results.
However, it turned out that the coating of the mask is likely made from per- and polyfluoroalkyl substances (PFAS), which are almost impossible to remove even with lab access, and which protected the mask against any dyeing attempts.
A somewhat frustrated response led this one to order tinting foil (black and silver) for experimentation instead. Black foil has the disadvantage of wrinkling, is commonly used, and does not look as good as the dyeing method. The idea was therefore to experiment with silver foil first before resorting to black foil.
Although the first attempt looked quite poor due to persistent wrinkling, another approach worked well and resulted in a unique look that, in this one’s opinion, is even better than the standard black tint achievable with black foil.
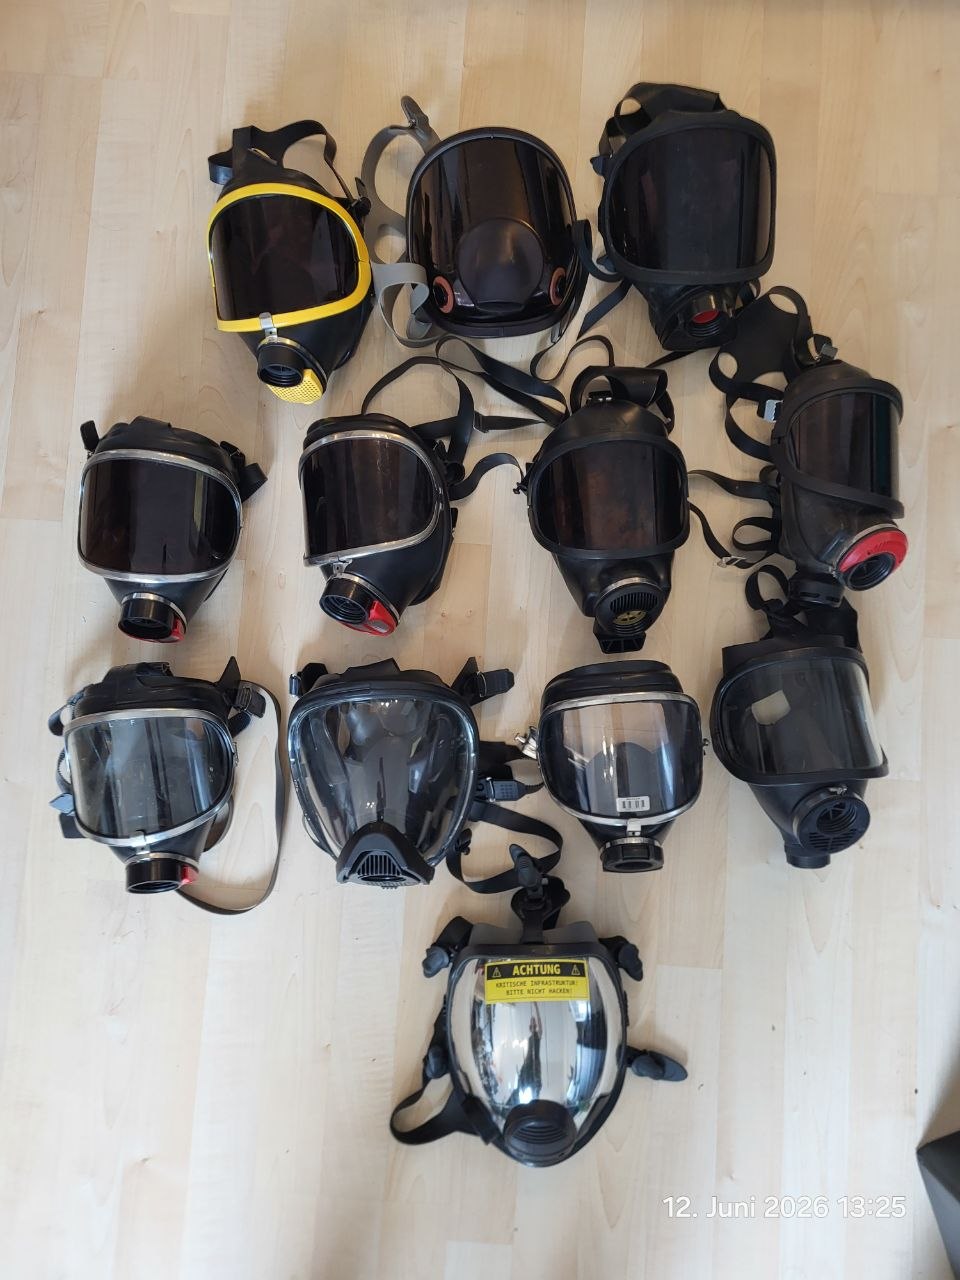
Since this one was still curious about tinting masks using the dyeing method, it ordered 11(!) used masks from eBay and began experimenting with them. As it turned out, the dyeing process worked perfectly well, and most masks were later given away to other drones, friends, and interested Fediverse followers for around 30€ each (to help cover costs).
This one would like to make a video tutorial for the methods below.
Since it does not want to waste money on additional supplies (e.g. masks and dye) that may end up unused, it would love to hear from beings who want to try one of the approaches and record a video together.
Dyeing
The procedure is basically the same as described in the aforementioned video. It involves using liquid dye and dipping the visor and any parts to be colored into it.
Supplies
- A large, cheap pot from a local store (this one got its from Action for <20€)
- Jacquard iDye Poly (15€)
- A wooden spoon, or anything suitable for stirring the mixture and dipping the items
- Some additional tools such as clothespins, metal clamps, or zip ties, old towels, and a bucket
- Mask / visor to be tinted
- Optional: some small polymethyl methacrylate plates
Preperations & Process
First of all, disassemble the mask in order to free the visor. Usually there are guides out there on how to do this for well-known models, but it is also quite intuitive. Make sure that the visor is made of a dyeable material, peel off any protective films, and clean it as thoroughly as possible.
For some masks, such as the 3M 6000, it might also look nice to dye some plastic parts, e.g. the cover in front and the plastic surrounding the visor. If these should also be colored, proceed the same way and ensure all parts are properly cleaned.
Pay attention to the instructions on the dye package regarding ventilation, and take into account that dye will stain things (or just do it in the kitchen like the maniac beeper that you are). Also pay attention to proper waste disposal.
Fill the pot with water, add the dye and the dye enhancer (both typically included in the dye package), and heat the pot. Stir it and make sure everything dissolves properly and heats evenly until it stays at a gentle simmer (this one kept it on 4/6).
Once the dye bath is ready, and some small polymethyl methacrylate plates have been obtained (or other parts from the mask), consider doing a test run by placing one in the pot for about 5 minutes. Ideally, whatever is being dyed should float freely; use clamps, a spoon, or zip ties to suspend the plate in the liquid. Contact with the bottom of the pot or friction points may result in an uneven tint.
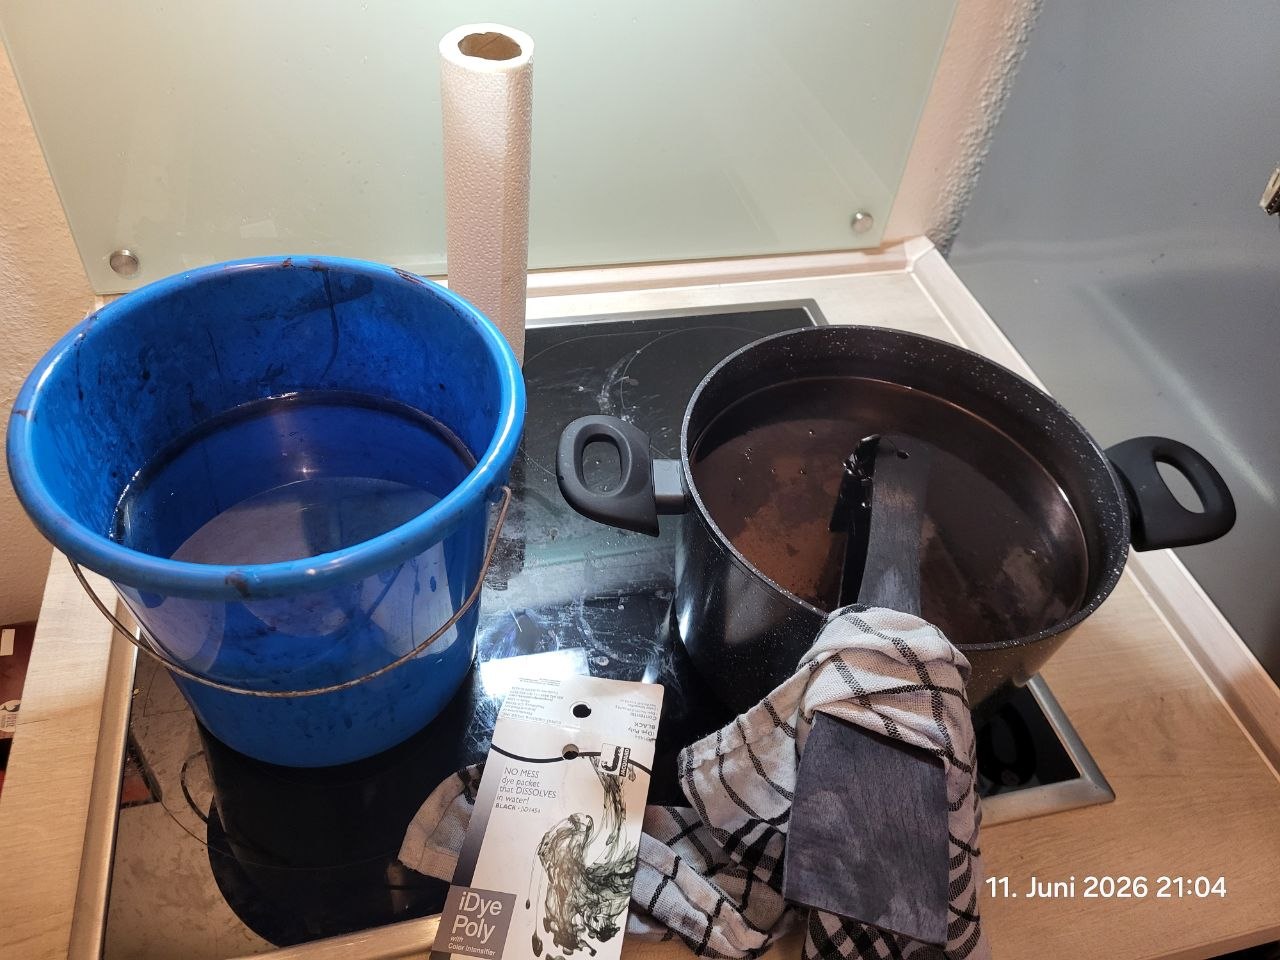
After 5 minutes, transfer it into a bucket that is either already filled with cold water or used to carry the plate to a place where cold water is available, and rinse it. Ideally, the tint should be strong enough that the plate is visible when held against a light background (e.g. a window), but not visible against a darker background.
The visor and other parts can be colored in the same way as the plates. Use this to adjust the duration to something reasonable for the visor based on the result. For example, if the plate becomes fully black, either reduce the duration or dilute the dye.
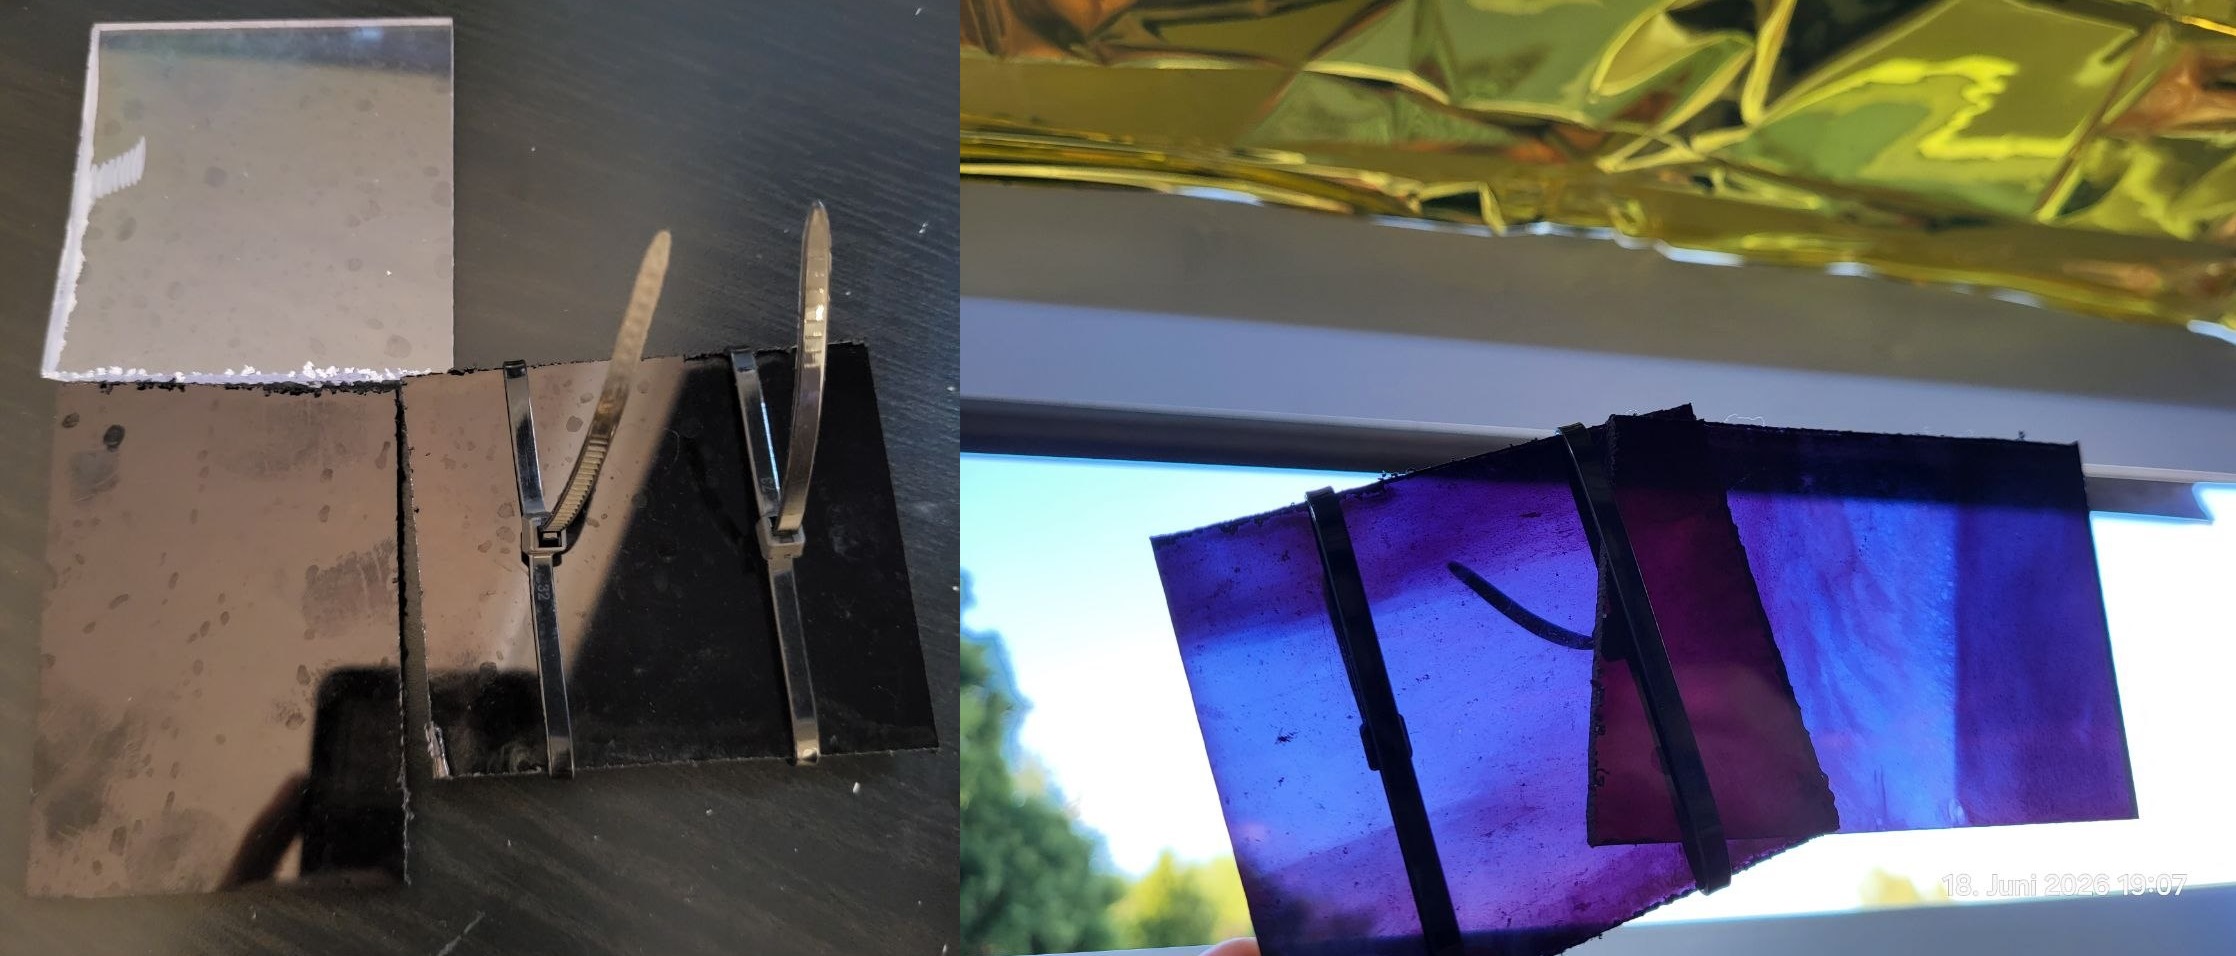
As visible in the picture above, the plates appear reflective against a dark background (as they would from the outside of the mask) and transparent when held against light, similar to what is visible while wearing the mask.
Feel free to reach out to discuss possible assistance or collaboration.
Since it is always possible to increase tint, consider doing multiple shorter dips rather than over-tinting the visor. Keep in mind that the visor and mask parts may behave differently than the sample plates.
Once everything is tinted, reassemble the mask, and voilà-done!
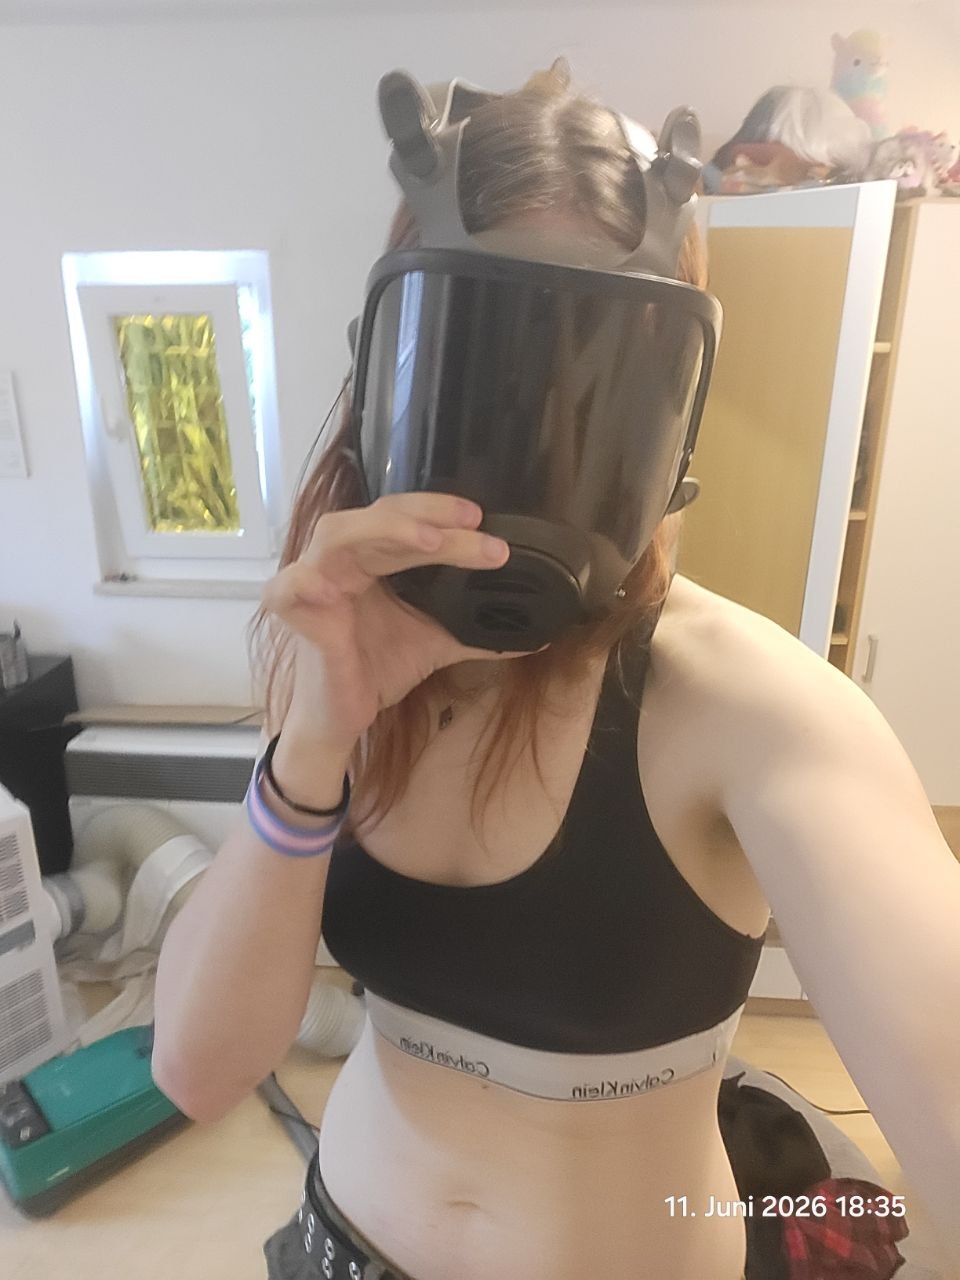
As one can see in the following image, the visor is tinted. However, this one also decided to tint parts of the frame and the plastic covers, so it looks slightly better.
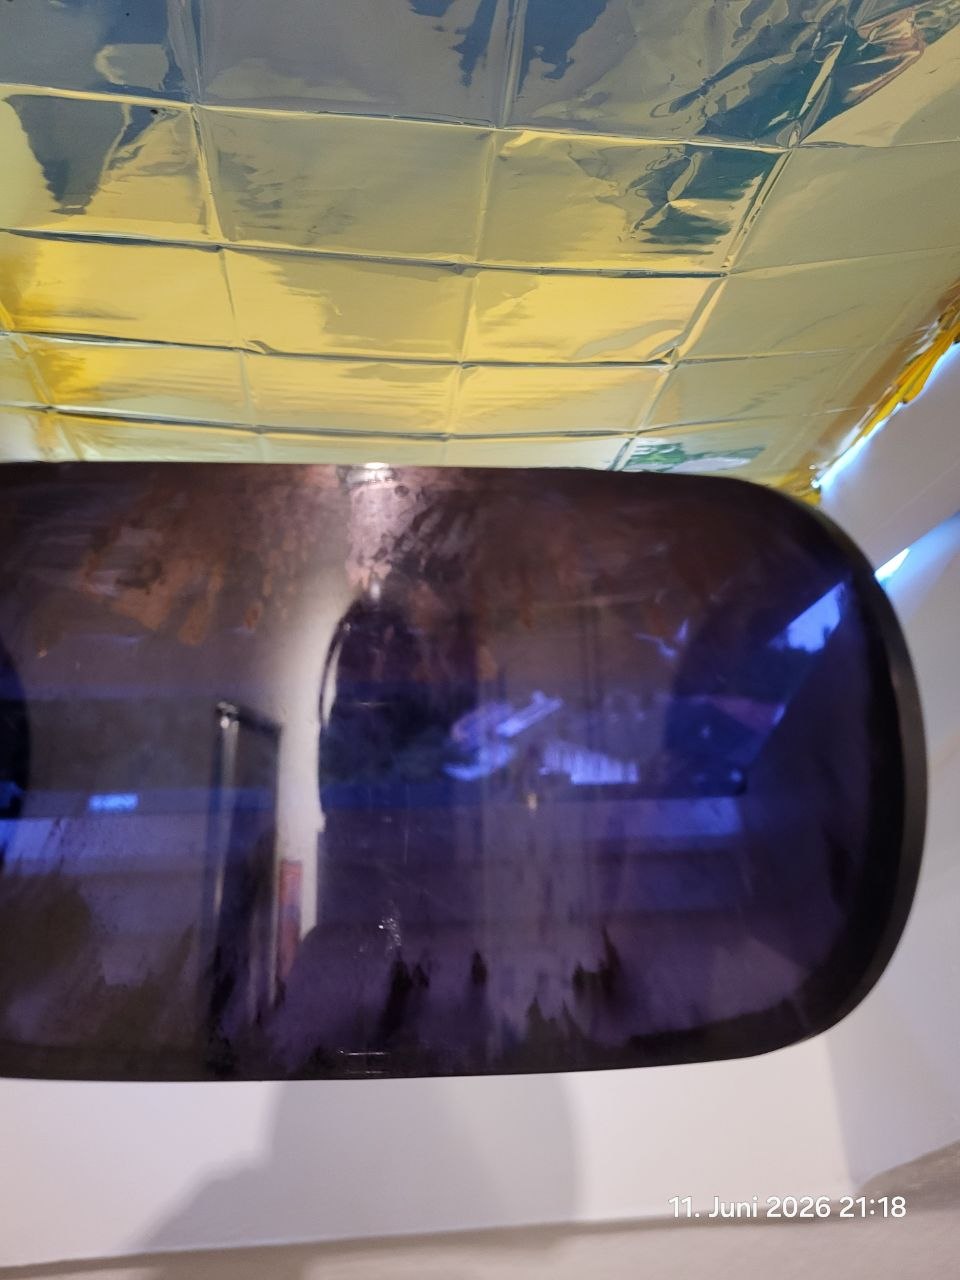
However, heavily used, unclean, or damaged visors will result in an uneven tint, as can be seen below.
Silver Foiling
Alright, so as mentioned before, a lot of beings seem to foil their visors (in black). As already noted, this can be difficult due to the curvature of curved masks.
Due to this, and out of curiosity, this one tried using one-way reflective silver window foil instead of black tinting foil. The idea behind this was that it might behave differently, or that if artifacts such as overlaps or wrinkles became visible, they might look nicer.
However, the first attempts to foil using silver foil looked quite bad and uneven, with ugly wrinkles and other issues. The second attempt turned out great, though, and in this one’s opinion looks even better than black tinting foil.
Supplies
- Craft scalpel and cutting mat
- A ruler
- Silver foil
- Mask / visor to be tinted
Preperations & Process
Just as with dyeing, it is easiest to free the visor first by disassembling and cleaning the mask, and then reassembling it once the foiling is complete.
This one remembered how globes are produced and what shapes are usually used to cover round objects. However, cutting those forms by hand without a stencil is not easy, and there is also a lot of overlap when not adapting to the given curvature, as most masks are not perfectly spherical either. This led to experimenting with various patterns and techniques, most of which sucked.
After removing the first attempt from the mask, a few iterations later it seemed like stripes about 1 cm wide could be applied to the surface without resulting in wrinkles or other issues. To create a somewhat evenly distributed design, the idea was to apply a 1 cm wide stripe vertically across the inside of the mask. Horizontal alignment reminded this one too much of window blinds or sunglasses. From that stripe on, following the curvature of the mask from the top, additional stripes were applied with slight overlap. Cutting the 1 cm strips was done using a scalpel and a cutting mat. The protective film was removed using sticky tape (which is easier than peeling it off with fingers) after cutting and before applying the strips to the mask.
While applying the stripes, this one tried to leave the length slightly beyond the height of the visible visor, allowing the plastic that locks the visor in place to also fixate the strips. Towards the bottom and top, strips were shortened using the scalpel as well, without worrying about minor scratches, since those would be covered by the plastic surrounding the visor anyway.
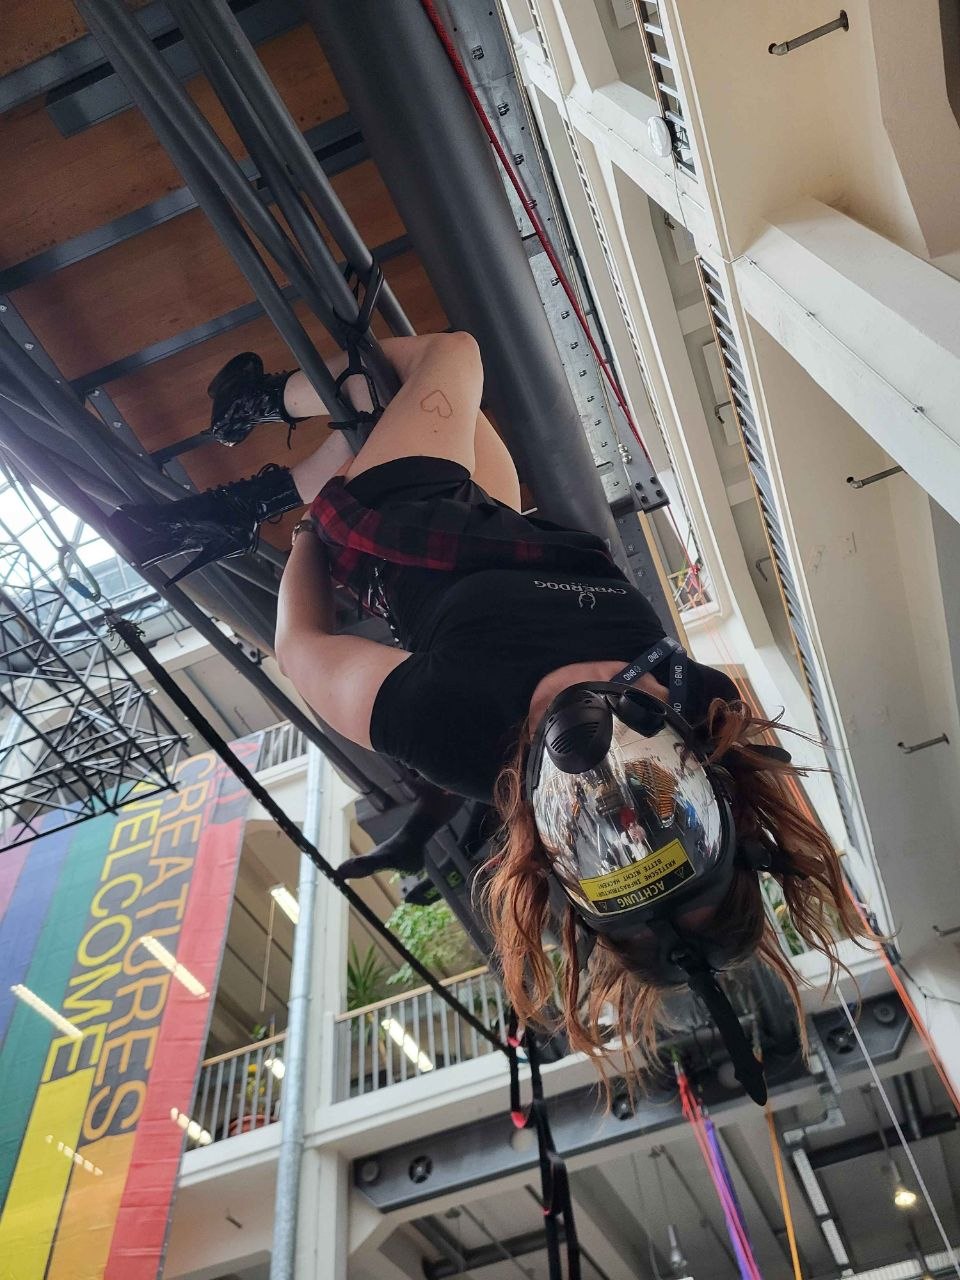
The end result is a mask that looks like this:
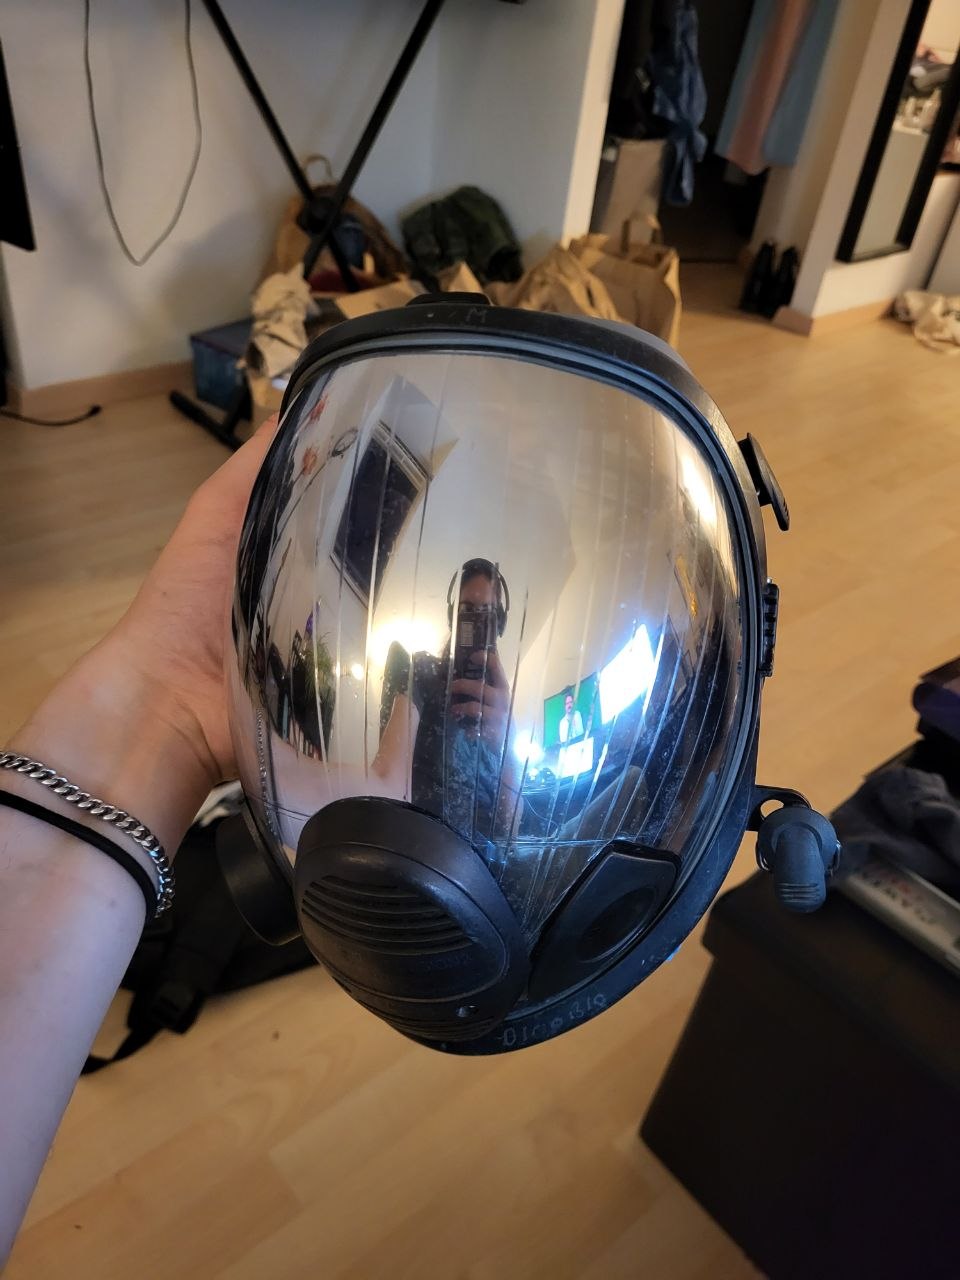
This one is quite happy with it, as it looks unique yet uniform and professional, without wrinkles or unintended artifacts. It has also received many compliments so far.
There are many more ways to experiment with foiling, and this one would suggest trying new ideas. Generally, this one is a fan of the reflective silver look, a style that likely cannot be achieved using the dyeing process, but possibly with spray paints. It also confuses many beings when they see themselves while talking, and one should be careful when looking at screens, since reflections will be visible to others.
BeepBoop!
What’s Next?
Good question. There is so much more one can do!
For example, add LEDs to the mask as described in the referenced blog posts. Or obtain a control headset, lots of latex, restraints, and boots, get chipped, be creative, and explore!
Update 13.08.2026: Someone mentioned that it is possible to remove protective shielding that prevents tinting using bleach. I have not tried this yet. It might also be worth a shot to see if chlorine, hydrogen peroxide, or aceton might work to remove the protective layer. Try to check if the visor has any protective coating before obtaining a mask and if possible avoid such protective layers.
-
The reader of this text. Drones like to refer using third perspective, see https://wiki.beeper.network/third_perspective. ↩